


Drywall Installation & Repairs
Complete Drywall Services in El Paso, Texas
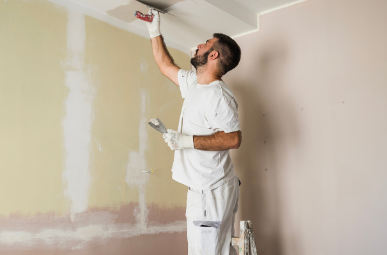
Professional Drywall Repair
Our expertise lies in delivering professional drywall repair services. Our team of drywall specialists excels in resolving various drywall problems, whether it's a minor patch job or a complete room remodel.
Competitive Pricing
We provide fair and transparent pricing for our drywall services, ensuring excellent results at affordable rates. Count on us to deliver outcomes that exceed your expectations while staying within a budget that brings you satisfaction.
- Drywall repair and install
- Drywall taping, mudding and sanding
- Hole patching, crack repairs & touch-ups
- Plaster Skim-coating
- Repairing water damage
- Drywall priming/ painting
Repair and Patching Techniques:
- Fixing small holes and dents in existing drywall.
- Patching larger damaged areas or sections.
- Blending repairs seamlessly with surrounding texture and finish.
- Matching paint or texture for a cohesive look.
Key Considerations:
- Implementing soundproofing techniques during drywall installation.
- Using moisture-resistant drywall in moisture-prone areas like bathrooms and kitchens.
- Opting for fire-resistant drywall in high-risk zones.
- Installing drywall over insulation for enhanced energy efficiency.
- Incorporating drywall access panels for concealed utility access.
- Addressing mold or water damage issues promptly.
Safety Measures:
- Employing proper lifting methods to prevent injuries.
- Wearing protective gear such as gloves, goggles, and dust masks.
- Safely working on ladders or scaffolding.
- Ensuring adequate ventilation during sanding and mudding processes.
- Being mindful of electrical and plumbing hazards.
Cost Management:
- Estimating the required materials and tools.
- Comparing costs of different drywall types and accessories.
- Factoring in professional labor costs for installation.
- Budgeting for unexpected repairs or modifications.
Regulations and Compliance:
- Familiarizing oneself with local building codes and regulations concerning drywall installation.
- Ensuring adherence to fire safety, soundproofing, and moisture control standards.
Maintenance Practices:
- Regularly inspecting drywall for damage or deterioration.
- Promptly repairing minor issues to prevent further damage.
- Consistent cleaning and maintenance to preserve appearance and integrity.
Contact Us
DIY GUIDE TO DRYWALLING
Essential Materials and Tools for Drywall Installation
To commence the drywall installation process smoothly, it's imperative to have the requisite materials and tools for an efficient workflow. Here's a detailed list of what you'll need:
Materials:
- Drywall sheets: Opt for the suitable type and thickness based on your project requirements (standard, moisture-resistant, fire-resistant, etc.).
- Drywall screws: Choose corrosion-resistant screws specifically designed for drywall installation.
- Drywall joint compound (mud): Select the appropriate type of joint compound for your project (setting type, lightweight, etc.).
- Drywall tape: Pick between paper, mesh, or fiberglass tape to reinforce joints and seams.
- Corner beads: Utilize metal or vinyl corner beads for safeguarding and strengthening outside corners.
- Drywall primer: Apply primer to prep the drywall surface for painting or finishing.
Tools:
- Drywall saw or utility knife: Essential for cutting drywall sheets to the required size and shape.
- T-square or straight edge: Ensures precise cuts and straight lines.
- Screw gun or drill: For fastening drywall sheets to framing using screws.
- Drywall rasp or sanding block: Smoothens rough edges and uneven surfaces.
- Mud pan or hawk: Used for holding and applying joint compound.
- Joint knives (mud knives): Various sizes for applying and smoothing joint compound.
- Drywall sanding pole or sanding block: For sanding joint compound to a smooth finish.
- Tape measure and pencil: For measuring and marking drywall sheets and cuts.
- Safety gear: Gloves, goggles, and dust mask for protection against dust and debris.
Installing New Drywall
With your materials and tools at hand, let's delve into the step-by-step process of installing new drywall:
- Surface Preparation: Ensure the framing is in place and clear any debris from the installation area.
- Measuring and Cutting Drywall: Measure the area to be covered and cut drywall sheets to size using a drywall saw or utility knife.
- Hanging Drywall Sheets: Position the drywall sheets against the framing and secure them with drywall screws, spacing them evenly along the edges and studs.
- Taping and Mudding Joints: Apply joint compound along the seams, embed drywall tape, and smooth out excess compound with a joint knife. Allow it to dry.
- Applying Additional Coats: Apply additional coats of joint compound as needed, feathering the edges to blend with the surrounding surface. Sand the surface smooth between coats.
- Sanding and Finishing: Once the joint compound is dry, sand the surface smooth with a sanding pole or block. Prime the drywall surface before painting or finishing for proper adhesion.
Taping: Perfecting Seamlessness
Taping plays a pivotal role in creating a flawless drywall surface. Here's how to master the art of taping:
- Applying Joint Compound: Use a joint knife to apply a thin layer of joint compound along the seam or joint.
- Embedding Drywall Tape: Press drywall tape into the wet joint compound, ensuring it is fully embedded without wrinkles or bubbles.
- Smoothing Out Excess Compound: Use a joint knife to smooth out any excess joint compound, feathering the edges for a seamless transition.
- Drying Time: Allow the joint compound to dry completely before proceeding with additional coats or sanding.